Crème Brûlée

IMG_9989

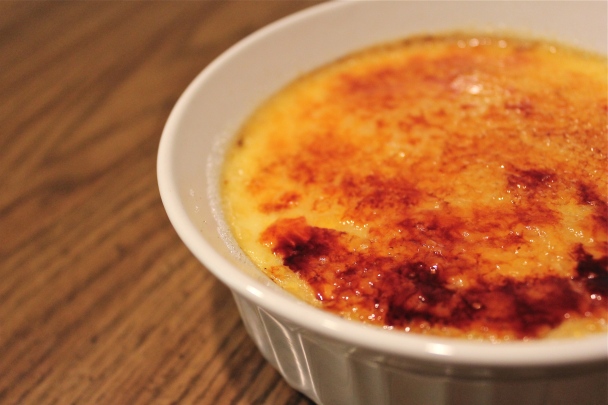
I’m a sucker for crème brûlée. Creamy, sweet goodness with a hardened sugar layer. It’s my favorite dessert to get at fancy restaurants, and considering how I’m still in college, I don’t go to fancy restaurants very often, meaning crème brûlées aren’t on my tastebuds very often. I’ve always wanted to try to make these, but they always seem to be so crazy complicated…but they’re not. Yeah, you’ll need a ramekin and kitchen blow torch (and thank goodness Sam had one!), but it’s not too bad. You whisk egg yolks (which are perfect considering how many leftovers I have from macarons) with some sugar and vanilla, heat up cream, pour some cream into the yolks, pour the yolk mixture into the rest of the cream, bake in a water bath, let cool, sprinkle with sugar, then TORCH IT UP (gently!). Crack that sugar crust, then gobble it up…not too bad right?? Think about how much money I’ll save! Not that much, but it’s okay to think about it, right? ;)

IMG_9979

Crème Brûlée
Makes one 16 oz ramekin (can be doubled)
Adapted from All Recipes

Ingredients:

3 egg yolks
3 tablespoons sugar, divided
1/4 teaspoon vanilla extract
1 1/4 cups heavy cream

Preheat oven to 350˚F.

Beat egg yolks, 2 tablespoons sugar, and vanilla in a mixing bowl until thick and creamy.

In a saucepan, heat the cream over low heat until it almost comes to boil. Pour a little of the hot cream into the egg yolk mixture and whisk. After doing so, pour the cream and yolk mixture into the rest of the cream and whisk. If foam builds up on the top, then you can skim it off with a strainer. Pour the mixture into a ramekin, then place the ramekin in a baking dish. Prepare a water bath; pour hot water in the baking dish until it comes halfway up the side of the ramekin.

IMG_9939

Bake for about 20 minutes, or until the brûlée jiggles slightly (like jello) in the middle when shaken gently. Let the brûlées cool in the water for about 15 minutes, then put in the refrigerator to chill. Let it come to room temperature before torching.

IMG_9942IMG_9948

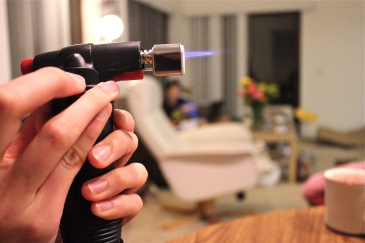
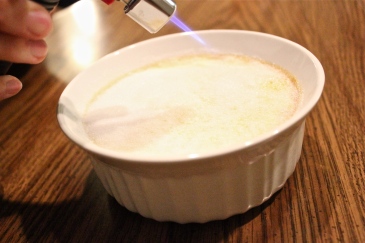
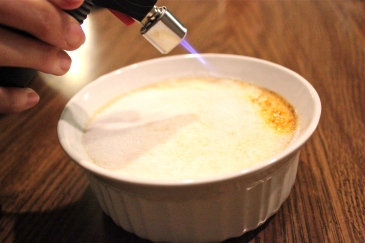
To torch, sprinkle the tops with white sugar, and shake off the excess. With a kitchen torch, caramelize the sugar carefully, being careful not to stay in one place too long as the sugar burns easily. Serve immediately.

IMG_9949IMG_9951IMG_9955IMG_9960

Move your torch in a swaying motion. Watching the sugar caramelize is pretty cool too!

IMG_9968

Until next time,

Soli Deo Gloria, and happy reading, eating, and baking!

P.S. Special thanks to my roommate Samantha Ho who taught me how to torch! And torched for me. And let me use her DSLR, ramekin, and blowtorch. And CONGRATULATIONS to her for getting baptized this past weekend!!!!!! Praise the Lord for blessing me with such an awesome sister in Christ. :)

IMG_9819

Oreo Cupcakes


IMG_9782

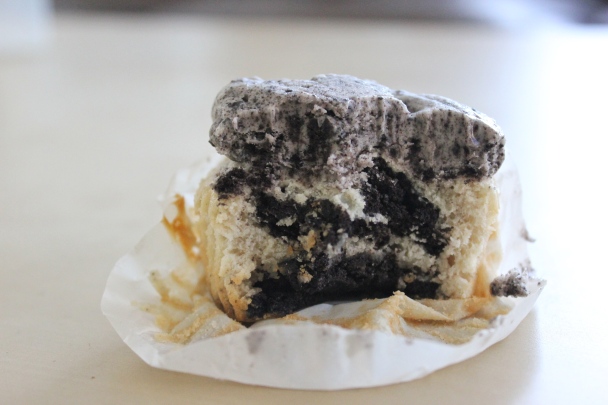
Remember the pack of Oreos I got on sale at Ralph’s? One pack went into making these cookies, and the rest have been sitting in our apartment for almost two months. But HAVE NO FEAR, the Oreos were still okay. Anyways, I went through a phase where I baked a lot of Oreo goods–Oreo cupcakes, Oreo stuffed chocolate chip cookies, cookies and cream chocolate chip cookies…actually I think that’s it. BUT I’ve never worked with that many Oreos in one summer before. Needless to say, everything was delicious, but my favorite were these Oreo cupcakes using white cake mix. I found some white cake mix in the apartment…but it expired in June of 2010. Gross. I’ll have to do that recipe again the next time I get my hands on cake mix and some Oreos on sale. I had to go to plan B, and I found this recipe that used a vanilla cake instead of chocolate as a base. The flavor is so good; the cupcakes have Oreos in every bite, and the frosting tastes like cookies and cream ice cream. But one note: DO NOT OVERMIX. I’m not going to lie; I overmixed and my cupcakes came out tough and a little dough-y, but it was still soo good. I was worried my friends wouldn’t like them, but they all seemed to enjoy them. Happy tummies = happy me, right?! :)

IMG_9778

Oreo Cupcakes
Makes 21-24 Cupcakes
Cupcake from Beantown Baker, Frosting from How to Eat a Cupcake

Ingredients:

For the cupcakes:
1 stick unsalted butter, softened
1 cup milk
2 teaspoons vanilla extract
2 1/4 cups flour, plus 2 tbsp for the Oreo chunks
1 teaspoon baking powder
1/2 teaspoon salt
1 2/3 cup sugar
3 large egg whites, room temperature
1 pkg Oreo cookies (~45 cookies)

For the frosting:
1 stick unsalted butter, softened
1 3/4 cup powdered sugar
a pinch of salt
1/3 cup whipping cream
1/2 teaspoon vanilla extract
remaining crushed oreos from the cupcake

Preheat the oven to 350˚F. Insert liners into a medium cupcake pan.

IMG_9697

Twist apart 24 Oreos. Place the cookie with the filling side up in the bottom of each paper liner. Crush the other halves and set aside for the frosting.

IMG_9703

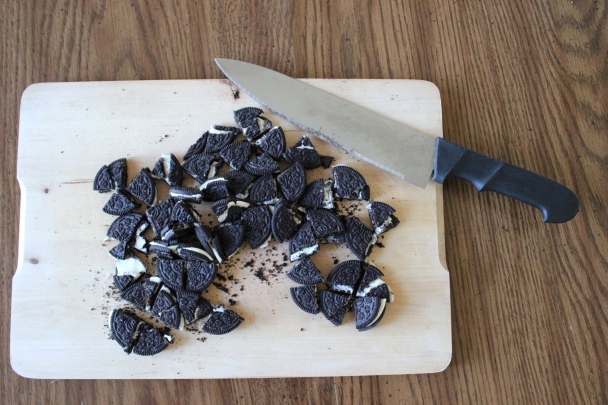
Cut the remaining Oreo cookies into quarters (You can cut them smaller if you’d like. Quarters are nice because you get big Oreo chunks in each bite); toss with the 2 tablespoons of flour and set aside.

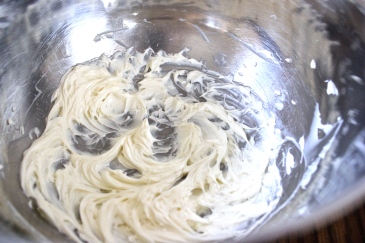
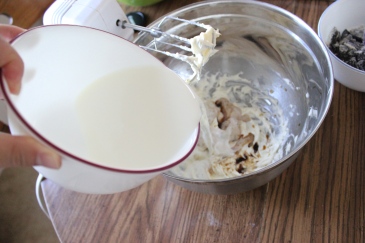
In a large bowl, beat the butter until fluffy. Mix in the milk and vanilla.

IMG_9715IMG_9717

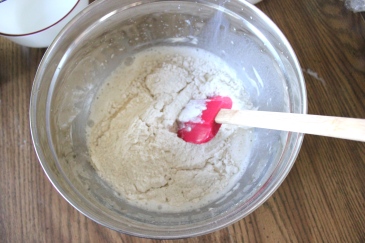
In another bowl, mix together the flour, baking powder and salt. Add the dry ingredients to the butter mixture. I would do this part by hand to avoid overmixing and because the batter is very thick at this point.

IMG_9707IMG_9722

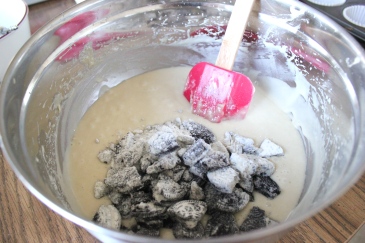
Stir in the sugar, and beat for 30 seconds on low speed. Turn the mixer to medium speed and beat for 2 minutes. Add the egg whites and beat for 2 more minutes. Stir in the quartered cookies.

IMG_9726IMG_9728

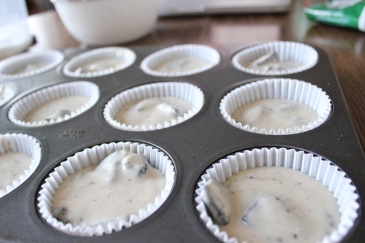
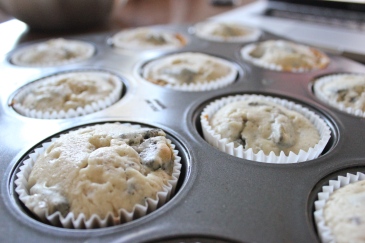
Fill the cupcake liners 2/3 full, and bake for 20-23 minutes or until a toothpick inserted in the center of the cupcakes comes out clean.

IMG_9758IMG_9763

For the frosting, cream together the butter, powdered sugar, and salt. Beat until light and fluffy, then add the whipping cream and vanilla. Beat until smooth or until it’s thick enough to pipe. Fold in the remaining crushed oreos. Frost on cooled cupcakes.

IMG_9771

Fin. I forgot to garnish with the two extra Oreos I had. Oops. And obviously, my cupcake and piping skills need some work. Will do, in due time…

For now,

Soli Deo Gloria, and happy reading, eating, and baking!

Magic Custard Cake

IMG_9690

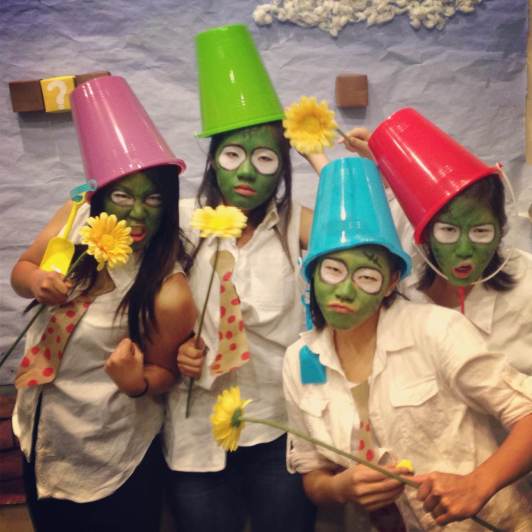
Today, I am thankful for campus fellowships. We had our joint brothers’ and sisters’ appreciation last night, and it was great! The theme was video games, so it was nice to see everyone dress up in different characters. But to be honest, it’s been a struggle for me this past year to get myself to go to fellowship during the week, but I think it’s because my heart lies at my church back home. I’m realizing as I go that campus fellowships are probably not my preference. I love how AACF’s a great, solid fellowship (not a church! Campus fellowships are not churches!), but I guess it just doesn’t fulfill what I’m really looking for. I do enjoy the community, and I know I should be putting more effort to get to know these brothers and sisters, but I think a lot of it comes down to me just being selfish and judgmental–and let’s face it, I have no right to be either of those things. J reminded me that even if it’s not my preference, it’s still a good fellowship, and I shouldn’t be judging it so much. And even if it doesn’t reach what I’m looking for, I know it has still impacted my college life in some way, and it’s probably doing the same for a bunch of other people there, and that is something to be thankful for. So, thanks AACF. You guys are great :)

IMG_9691

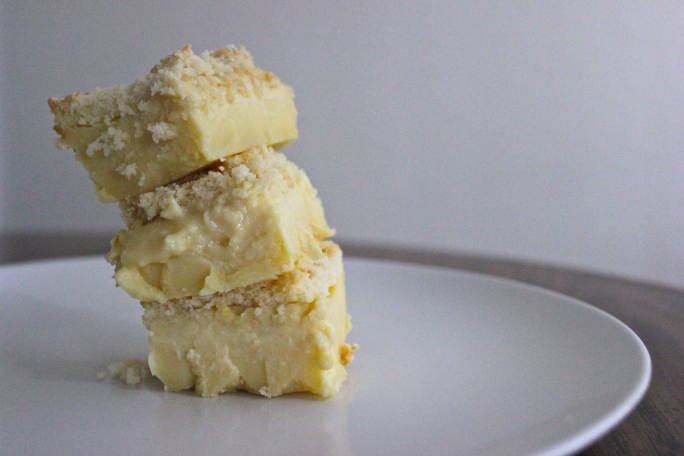
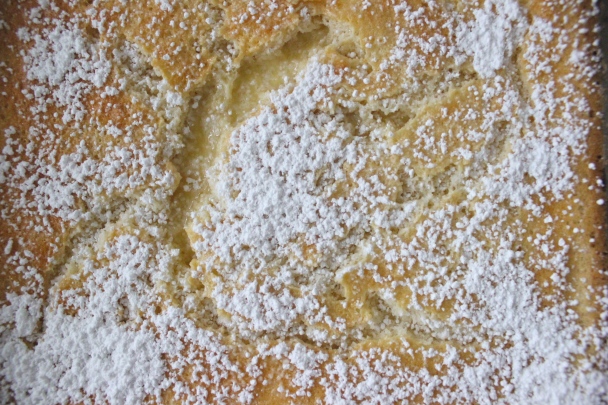
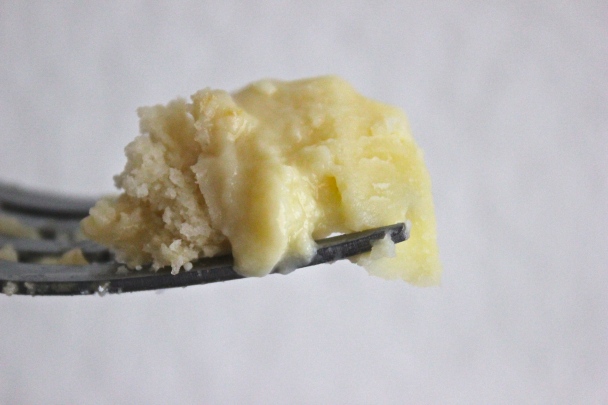
Now to the food part. You all must know that this cake is magical. You would think that something that bakes into three layers would need three different batters…but nope! It’s all one batter, once in the oven, and once in the fridge, and voila! Custard layers and a thin sponge cake layer, and it tastes like a portuguese egg tart (which I have yet to try to make!). The custard is sooo creamy, and I swear I can eat the entire pan by myself. But that’s not a good idea, and it’s no fun to bake when I don’t get to share. Happy tummies means happy me! Enjoy :)

IMG_9685

Magic Custard Cake
Makes one 8″x8″ square pan
Adapted from White on Rice Couple

Ingredients:

1/2 cup (1 stick) unsalted butter, melted and slightly cooled
2 cups milk, warm
4 eggs, separated
1 1/4 cups powdered sugar
1 tablespoon water
1 cup flour
1 teaspoon vanilla extract
extra powdered sugar for dusting

Preheat the oven to 325˚F. Lightly grease an 8″x8″ baking dish.

In a bowl, whip the egg whites to stiff peaks. Set aside. (I added a tablespoon or two of granulated sugar and about 1/4 teaspoon cream of tartar to help with the whipping. You know your egg whites have stiff peaks when you pick up the beaters and turn it over and the egg whites hold their peaks. Check here for a good reference.).

In another bowl, beat the egg yolks and sugar until light. Mix in the melted butter and water until evenly incorporated. Add the flour (I used cake flour, AP flour should be fine); mix well. Slowly beat in the milk and vanilla until everything is well mixed; you might want to hand mix it because the batter is very liquidy.

Fold in the egg whites, 1/3 at a time. Repeat until all the egg whites are folded in. Fold until there are no big chunks.

IMG_9674

Pour the batter into the pan and bake for 45-60 minutes, until the top is golden. Let the cake cool slightly, then place in the fridge to cool (or you can let it cool on the counter, it’ll just take a longer time and the custard might not be as firm). Allow the cake to cool completely before cutting. Dust with powdered sugar before serving.

IMG_9686

Until next time,

Soli Deo Gloria, and happy reading, eating, and baking!

P.S. If you must know what I dressed up as, my apartment and I were PLANTS VS. ZOMBIES. Can you tell?! photo (17)

Strawberry Cheesecake Stuffed Chocolate Cookies

IMG_9646

Fridays are my baking days. I have one class from 1-2 and no work, so I do what I do best…bake! And because I’m still in the apartment, I have access to Sam’s DSLR, meaning more pictures=more blogging. And I’m going to reiterate this until I get it right–I’m still learning how to edit and take pictures, so bear with me! My photos are inconsistent, but I would still like to share recipes and amateur photos with you readers! Thanks for the support! :)

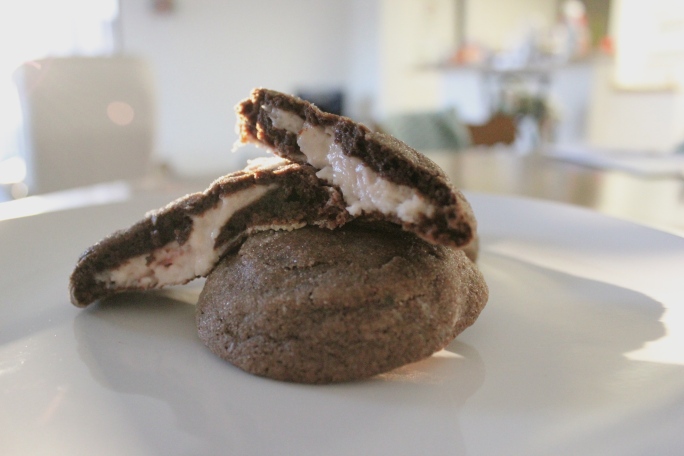
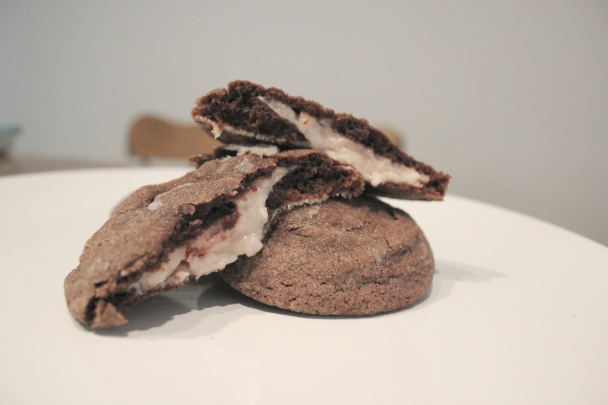
I had 5 ounces of cream cheese leftover from the cinnamon rolls I made last Monday, so I looked through my bookmarks to find something that would use up the rest of the brick. I bookmarked this recipe a while ago, and I finally got around to trying it! Yes, it was yummy (it was a lot better after it sat in the fridge!!), but the process was a pain. The cheesecake filling was so difficult to stuff inside the cookies, and even after I chilled the dough, it was still hard to work with. In the end, I got the work done, I made tummies happy, and that’s what really matters. :)
IMG_9634

The outside had a nice chocolate flavor that paired well with the cheesecake. The fruit flavor didn’t come out well in the cheesecake, but you could taste the cheesecake flavor. Maybe I’ll add more jam next time. This recipe takes time, and it’s one of those where refrigerating it would make a better cookie. If you’re up for the challenge, I’d say go for it! Then use the extra cream cheese to make the cinnamon rolls! How efficient :)

IMG_9648

Strawberry Cheesecake Stuffed Chocolate Cookies
Makes about 8 large cookies
Adapted from Buns in My Oven

Ingredients:

For the Cookies:
1/2 cup unsalted butter, softened
3/4 cup white sugar
1 egg
1 teaspoon vanilla extract
1 cup all-purpose flour
1/3 cup cocoa powder
1/4 teaspoon baking soda
1/4 teaspoon salt
extra sugar for rolling

For the Filling:
5 ounces cream cheese
1/4 powdered sugar
2 1/2 teaspoons strawberry jam

Cream together the butter and the sugar until light and fluffy. Beat in the egg and vanilla. Set aside.

In another bowl, mix together the flour, cocoa powder, baking soda, and salt. Add the dry ingredients to the wet ingredients and stir until combined. Chill the dough for at least 15 minutes so it’ll be easier to work with later.

For the cheesecake filling, beat together the cream cheese, powdered sugar, and jam.

IMG_9628

To assemble the cookies, flatten the dough into a disc between your hands. Place a teaspoonful of the filling into the center of the disc, then close the disc around the filling and roll into a ball. Alternatively, what I found easier was flattening the dough into a disc, placing a teaspoonful of the filling in the center, placing another disc on top, closing up the sides, and then rolling it into a ball. Place the dough balls into the fridge for a few minutes to make it easier to roll in the sugar later. Meanwhile, preheat the oven to 350˚F.

Roll the dough balls in the sugar, and place them onto a lined baking sheets, spacing them an inch apart. Bake the cookies for 10-12 minutes. When they are finished, cool them on a wire rack for 15 minutes, then in the fridge for another 30 minutes. Enjoy! And trust me, they taste better after they stay in the fridge.

IMG_9631

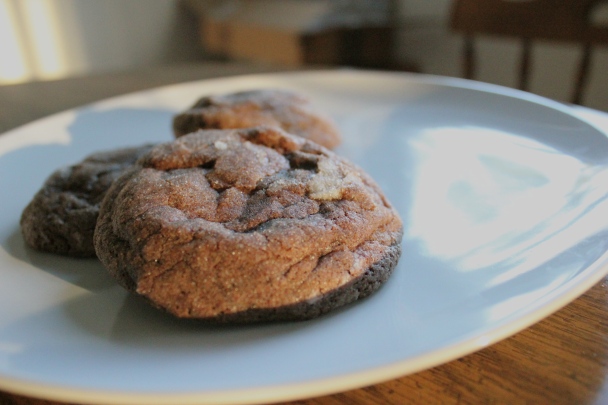
Nice, fat cookies. And note to self, taking photos when the sun is setting = bad lighting. It doesn’t help when you’re in a rush either. Haha.

Now…time to catch up on some unfinished reading for my classes. No baking for me tonight :(. But maybe tomorrow ;)

Until next time,

Soli Deo Gloria, and happy reading, eating, and baking!

Copycat DoubleTree Chocolate Chip Cookies

IMG_9545

FIRST OFF, to get this out of the way…I am no good with DSLR cameras. I want to invest in one so I can take better pictures of…everything, I suppose! So for now, I’ll have to stick to using Sam’s. But anyway, I can’t tell when pictures are blurry until they’re actually uploaded onto my computer in a larger size, and I am no good at getting good angles and lighting. So when it comes to foodotogaphy (is that it?), I have a lot to learn! Secondly, I don’t know how to use photoshop (yet!!), so for now, I’m using iPhoto and playing with the settings. But at least I’m trying, right?! I’m learning, I am learninggggggggg.

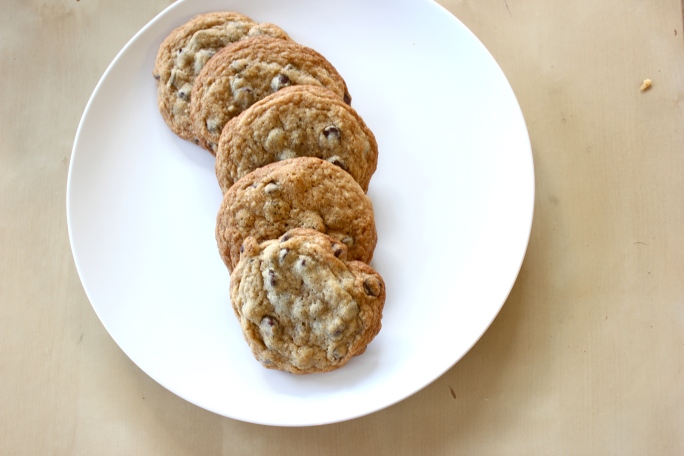
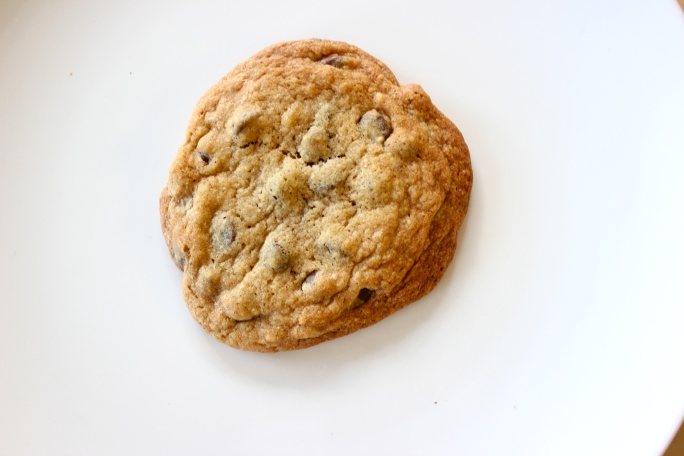
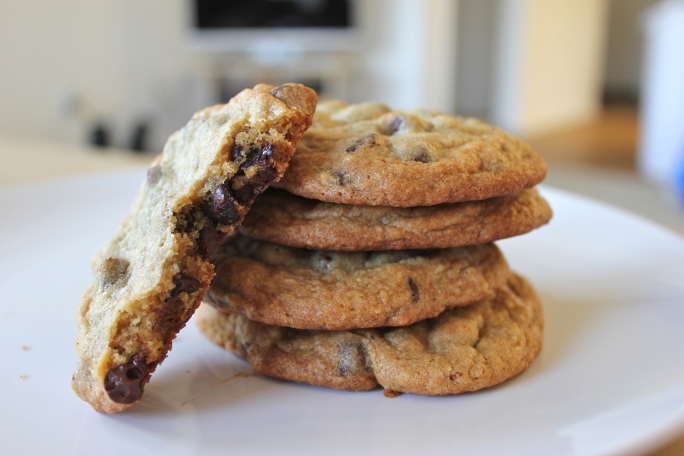
Now that that’s over with, COOKIES! Apparently, they’re “copycat DoubleTree chocolate chip cookies,” but I’ve never been to Double Tree and I’ve never had their cookies, so I can’t really tell you whether or not this tastes like the real thing (note: Casey Young just ate one and he said it’s close to the real deal. Trust him! I guess heehee). What I can tell you is that this is probably one of the best cookies I’ve ever had. Crisp on the outside, soft on the inside, and chocolate chips in every bite (no nuts, please!). It has an interesting texture on the outside because it uses ground up oats. I’ve never done it before, but I like it! The recipe also adds two other ingredients that you typically don’t find in chocolate chip cookie recipes–lemon juice and cinnamon. Apparently the lemon juice offsets the sweetness in the cookie. Sam tasted the cinnamon in the first bite, but I think she’s biased because she’s not a fan of cinnamon. Boo. So I guess the final verdict is, a) if you’ve been to DoubleTree Hotel, try this recipe so you can tell me whether or not it’s like the real thing, or b) if you haven’t been to DoubleTree Hotel, just try this recipe because it’s a keeper. IN CONCLUSION (my teachers always said to never end my essays with that. harhar), try this recipe. Thanks ;)

Chocolate Chip Cookies
(aka “Copycat DoubleTree Cookies”)
Makes about 25 large cookies
From Iowa Girl Eats

Ingredients:

1/2 cup old fashioned oats
2 1/4 cups all purpose flour
1 1/2 teaspoons baking soda
1 teaspoon salt
1/4 teaspoon cinnamon
1 cup butter, softened
3/4 cup packed brown sugar
3/4 cup granulated sugar
1 1/2 teaspoons vanilla extract
1/2 teaspoon lemon juice
2 eggs
10 oz semi-sweet chocolate chips (I used 12 because I omitted the nuts)
1 1/2 cups chopped walnuts (optional)

Preheat the oven to 350°F.

Place the oats in a food processor, and grind until fine.

IMG_9496IMG_9497

Mix in the flour, baking soda, salt, and cinnamon. I mixed it in the food processor because I was too lazy to get another bowl out.

IMG_9501

Beat together the butter, brown sugar, granulated sugar, vanilla, and lemon juice until light and fluffy.  Add the eggs and beat until combined. Gradually add the dry ingredients to the wet ingredients and mix well between each addition.

IMG_9506IMG_9511

Mix in the chocolate chips..and lots of it!

IMG_9516

Drop the cookies onto rounded tablespoons onto baking sheets lined with parchment paper. If you want, you can refrigerate the dough for a couple hours for thicker cookies (I was in a rush so I didn’t get the chance to do so).

IMG_9519

Bake for 10-12 minutes, or until the edges are golden brown. Cool on a cooling rack, and enjoy!

IMG_9528

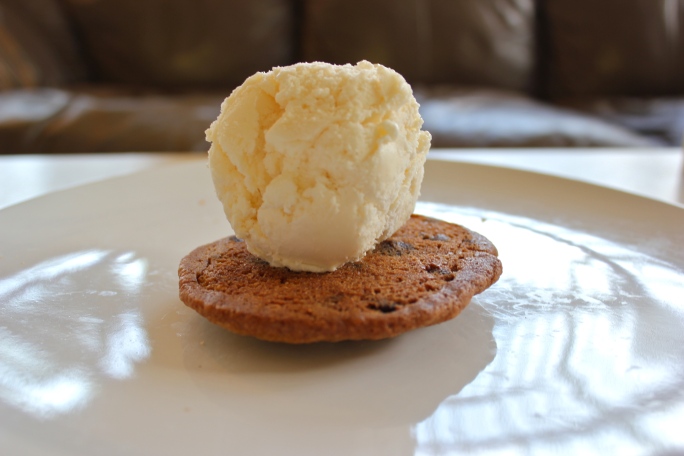
For a special treat…

One cookie down,

IMG_9584

Plus a scoop of ice cream,

IMG_9570

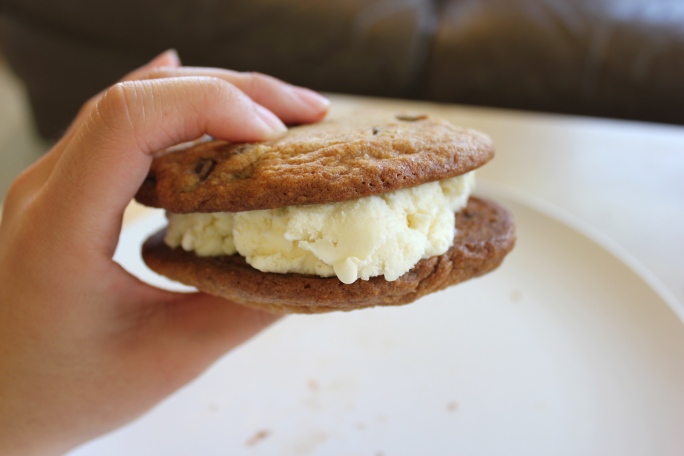
And voila!

IMG_9573

Chocolate chip ice cream cookie sandwiches!

Or you can eat it on its own. Your choice!

IMG_9534

Until next time,

Soli Deo Gloria, and happy reading, eating, and baking!

Cinnamon Rolls

IMG_9616

Imagine you wake up each morning with $86,000 in your bank account. You can spend it on anything you like, and each day you earn another $86,000. But here’s the catch: whatever amount leftover that you don’t use disappears. What would you do? I don’t know about you, but I’d do my best to spend every dollar wisely everyday. I’d make sure that I had used the most of that $86,000 each day.

But think about this: We are given 86,400 seconds everyday. Whatever second you don’t use…disappears and never comes back. Whatever time we waste, we don’t get it back.

Same concept, right? But unlike that $86,000, I don’t use my 86,400 seconds wisely. I waste my time on meaningless things, like TV, facebook, tumblr, foodgawker, etc. Think about how much time I’m wasting that I could be using to glorify God! Think about how I could be using that time to meditate on Scripture, to invest in others, to build up relationships, and to grow in my walk with Christ!

It’s the start of a new quarter! It’s week two right now, and classes are alright. I’m taking fewer classes this quarter, so that means more time in the office, at my desk, in the kitchen, and hopefully outside meeting up with other people. I’ve realized that I’ve been a bit of a hermit, only wanting to go out of my way to meet up with people when I felt like it. This quarter, I’m hoping I can spend more time with people intentionally, to actually get to know how they’re doing and how I can pray for them. I’m hoping to manage my time more wisely to be able to do all the things I want to and have to do. Fingers crossed! That’s my prayer request–to use the time God has graced me with more wisely, and to be more motivated to study and to be intentional with others.

From J: “You have 86,400 seconds in a day. Use it wisely, because you’ll never get those seconds back.”

IMG_9597

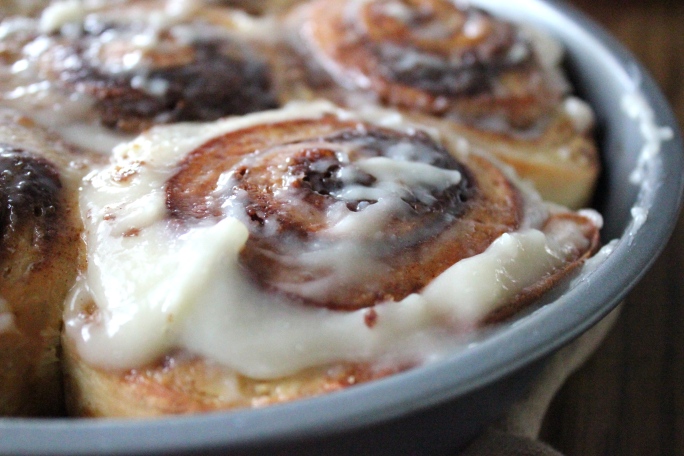
With that said…let’s talk cinnamon. There’s something deliciously “cinn-ful” (you see what I did there? har har har) about cinnamon rolls. Soft, warm bread swirled with cinnamon and brown sugar, topped with a rich, creamy cream cheese (hehe you see what I did there again? Okay, I’m done) frosting. It’s a little rich, but a little piece here and there is alright. J has a sweet tooth for cinnamon rolls, and we were watching Diners, Drive-ins, and Dives this one day, and Guy Fieri went to this restaurant where they made these HUGEEEE cinnamon rolls, seriously easily the size an individual pizza. He turned to me and said, “Can you make that?” I say yes, but it was months before I actually got around to it (after he asked me numerous times). This was my second try at cinnamon rolls–the first one was a little off, like something was missing. This one..blew me away. The rolls came out super moist and soft, and I have to say, bread flour really does make a difference. Anyways, I hope you all try this treat. So good, and so easy. You can even let the rolls rise overnight and bake them off in the morning! They’ll be gone before you know it; trust me!!

IMG_9617

Cinnamon Rolls
Makes about 12 rolls
Adapted from All Recipes

Ingredients:

For the Dough:
2 1/2 teaspoons rapid rise/bread machine yeast
1 cup warm milk
2 eggs, room temperature
1/3 cup butter, melted
4 1/2 cups bread flour
1 teaspoon salt
1/2 cup white sugar

For the Filling:
1 cup brown sugar
2 1/2 tablespoons ground cinnamon
2 tablespoons butter, softened

For the Frosting:
3 tablespoons cream cheese, softened
1/4 cup butter, softened
1 1/2 cups powdered sugar
1/2 teaspoon vanilla extract

Dissolve the yeast in the warm milk in a large bowl. Stir in the sugar, melted butter, salt, and eggs. Add the bread flour; mix well. Knead the dough into a large ball (dusting your hands with flour if needed), put it into a bowl, cover, and let rise in a warm place until doubled in size (about an hour). Meanwhile, mix together the brown sugar and cinnamon in a small bowl and set aside.

After the dough has risen, turn it out onto a lightly floured surface, and roll the dough into a 16×21 inch rectangle. Spread the softened butter onto the rolled out dough, and sprinkle it evenly with the sugar and cinnamon mixture. I like patting the mixture down into the dough. If you have extra, you can save it to sprinkle on top of the rolls before baking. Roll up the dough, and cut into 12 rolls. Place the rolls in a lightly greased 9×13 inch baking pan  (or two cake pans will work as well). Cover it with plastic wrap, and let it rise until doubled, about 30 minutes. Alternatively, you could let it rise overnight in the fridge, and let it come to room temperature before baking the next morning.

IMG_9610

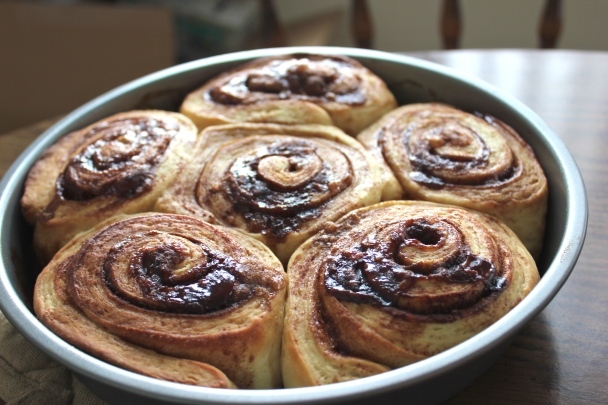
Remove the plastic warp, and bake the rolls in a preheated 400˚F oven until golden brown, about 13-17 minutes. While the rolls are baking, beat together the cream cheese, 1/4 cup butter, powdered sugar, and vanilla extract.

IMG_9612

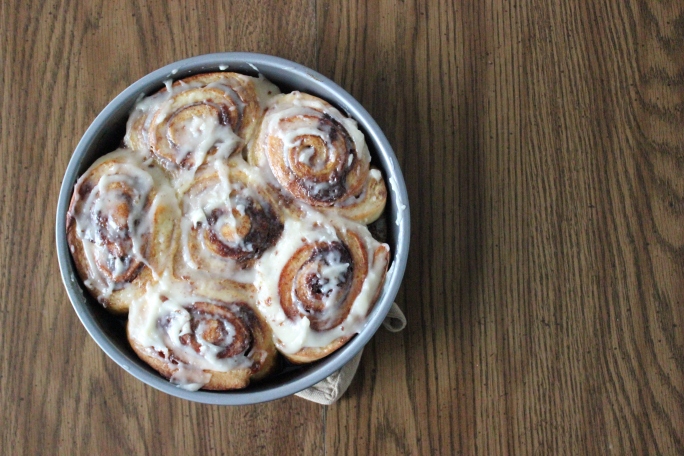
When the rolls are finished, spread the frosting onto the rolls. Be generous! The rolls are best enjoyed while warm. If it has gone cold, pop it into the microwave for 30 seconds to warm it up, and it’ll be just as delicious!

Before the cream cheese goodness:

IMG_9602

After:

IMG_9614

I’m done. Happy Monday!

Until next time,

Soli Deo Gloria, and happy reading, eating, and baking!

Springtime Update!

I’m baaacccckkkk!!! Sorry all for the long hiatus! I’ve been so busy with school, spring break, and (of course) baking that I’ve kinda neglected this blog. Sooooo…here’s a mini update for you all:

1) Spring quarter is here! Winter quarter was no good–filled with laziness and a lot of complaining. But I am thankful for good friends and family and J to remind me that I need to study for God’s glory and that I am blessed to receive and education. Soo…hopefully I can be more reminded of that this quarter.

2) Spring break was quite relaxing! I spent a few days in Pismo Beach and Santa Barbara with the family, just shopping, eating, and walking around. I also participated in a basketball tournament with my campus fellowship AACF! I scored half my team’s points for one game! That makes me sound like a really good basketball player, doesn’t it?! Well, I’m not. The truth is our team only scored four points, so that means I only got two points. But no one needs to know that part…right?! I spent the rest of the week baking…which leads to…

3) MACARONS! I started making macarons March 2012, and it’s been one of my favorite things to bake lately! It can be difficult, but I find it pretty exciting–I love slamming the baking sheets on the floor (I did that once and my family thought I was mad. I wasn’t!), I love watching the feet rise up when it’s baking (The ruffly parts of the cookies, not human feet! I’m not creepy, I promise.), and I love seeing the results and making other people happy. These little suckers cost a fortune in bakeries/shops, at least $1.50! I’ve even seen some a little bigger than a quarter go for $2.50. Ridiculous. But…after making them over and over again, I can see why these puny little french cookies cost so much…the labor is exhausting! I’ve been practicing a lot so I’ve been getting faster at making these, but they still take a lot of work.

Recently people have been ordering from me, which is exciting because catering has been something on my mind this past year. It makes me happy to see that people will pay for something that I make! I’ve had five orders so far, and I have two more coming my way in a coupla weeks. I’m working on some new ideas (thanks Timothy Lee!), so once those are launched I’ll be sure to blog about it.

Sorry there’s no recipe/tutorial today! But I promise I’ll get to it one of these days. But for now, I recommend you to look at Bravetart and Not so Humble Pie. Bravetart’s recipe was the first recipe I turned to once I got my kitchen scale (which is essential for macaron making!). I’ve recently started using Not so Humble Pie’s, but I recommend both sites. Both have information and instructions better than I can ever explain to you all, so check it out! I’ll get around to a tutorial one of these days, but I think I still have a lot of work to do before I can get around to doing so. For now..here are some pictures to show what I’ve been up to! You can also find more on my Instagram!

Soli Deo Gloria, and happy reading, eating, and baking! (And Happy April Fool’s Day! Play nice!!!!)

IMG_1270

Macarons filled with a peach buttercream!

IMG_0901

My watermelon macaron tower/pyramid! I topped the pink shells with black sesame seeds, and the bottom shells are green tea flavored. They’re filled with nutella (mostly because I got lazy :p )!

IMG_1446

IMG_1492

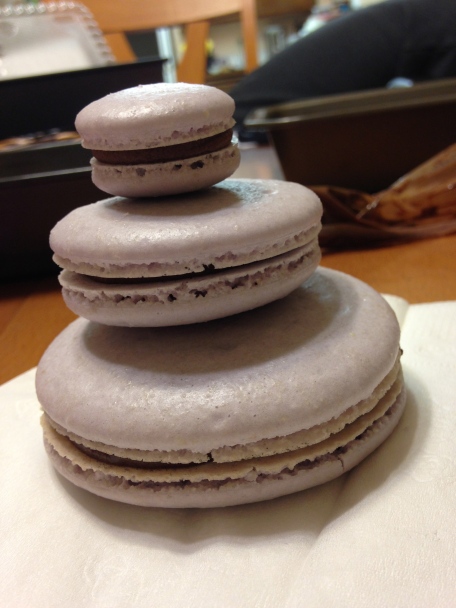
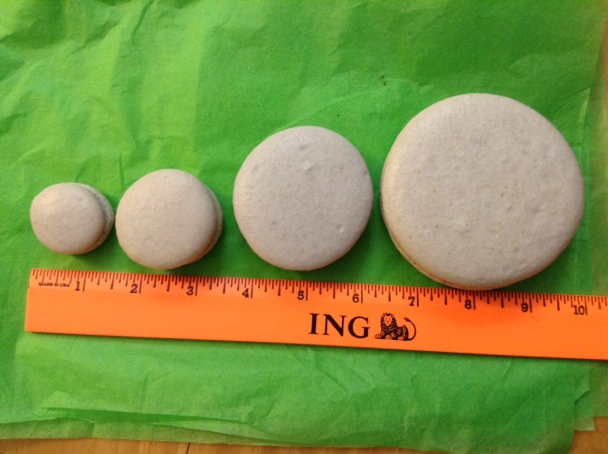
This was my second order–purple macarons with green tea ganache. This was interesting because it was the first time I had ever made different-sized macarons. My friend Arianne took pictures of the macarons next to a ruler. The second one from the left is the normal 1.5 inch macarons I usually make. Cool, huh?!

IMG_1678

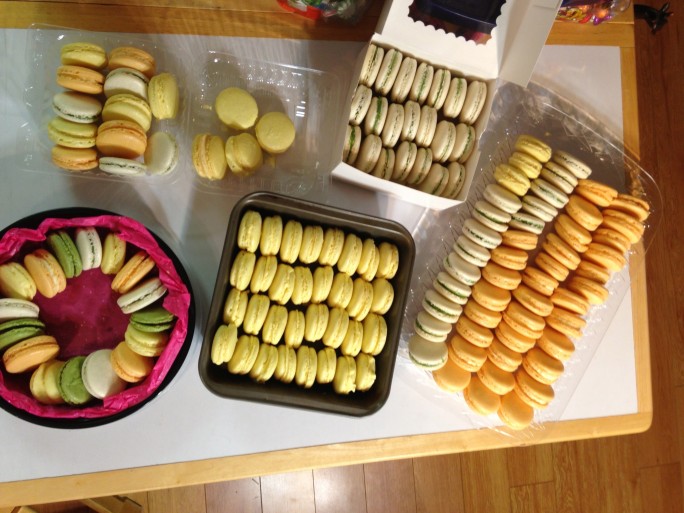
This was basically the end of my spring break. I had three orders–30 green tea ganache, 24 different flavored (which I usually don’t do, but she got lucky because I was baking for another big event), and 75 different flavored macarons for a bridal shower. It was hectic, but a lot of fun. A batch got messed up, but I was able to give those away to friends, and I dropped an entire tray of 31 macarons shells on the floor. Those could’ve made 15 whole macarons..so sad. Luckily I already had enough to fulfill the 75 macaron order. Oh, and the flavors are peach, lemon, and green tea! Hurray for Spring colors!

IMG_1696

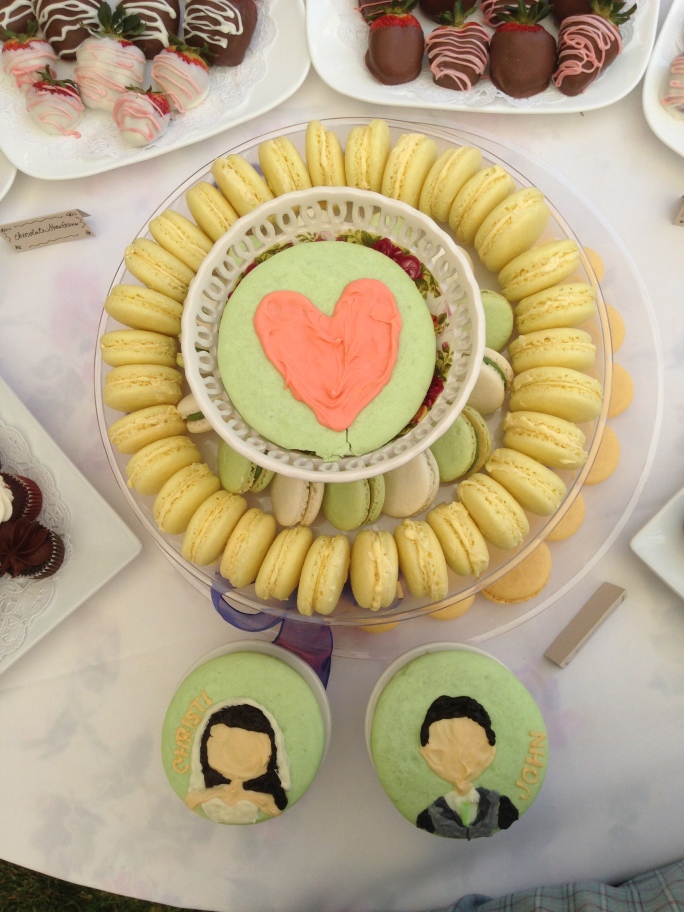
These were extra. It was something special that I wanted to do for the Wongs, who ordered the 75 macarons for Christi’s bridal shower. I copied their save the dates (which is designed by my good friend at Pale Designs! She also designs a bunch of other things, so go check it out!) and drew it onto these 4.25 inch macarons with white chocolate and food coloring. It took a while, but I’m proud of my work. I still have a lot of learning to do though!

IMG_1716

These were how my macarons were placed at the bridal shower. What do you guys think?? Let me know! I’d love to hear your comments!